Yet again folks,
I return to the subject of restoring the old ringed stunt
engines from the 60’ and 70’s. These include the
Enya 45’s and Super Tigre 46 plus other capacity engines
from the same manufacturers. Some of these motors were quite
poor from new, while others, like the ST46, had great reputations,
but of which there was the occasional “Friday night
special”. Whatever, I have a bunch of them and have
slowly been getting them to run properly.
Where I have been really slow, is in realising that the individual
rings must be fitted to the cylinder using lapping techniques.
Once you have the cylinder bore right, you are not finished!
If you have purchased a ring, no matter from whom, you then
have the problem of whether the ring actually fits your cylinder,
including whether the ring gap is “correct”: whatever
the latter means!
Here is my Enya 45 6002 story. As reported previously on
this site, Richard Morrow did wonders for me in honing my
new Enya 45 6002 sleeve. After this, the motor ran fine, at
least until the public display day at Whiteman Park. Out of
4 flights, I got in 3 really nice motor runs, but on a hot
Sunday afternoon, the wretched thing would not start. Luckily,
Peter White was flying adjacent to me, thus masking my embarrassment.
It was apparent that the motor would not start hot, even
from just the sun shining on it. Not good: was this another
piston/cylinder problem? Well, I reckon all problems are piston/cylinder
ones, unless proven otherwise; so I started to think about
pulling the motor down, yet again. However, fate stepped in,
for once, smiling upon me!
We received an invite to Stumax’s wedding in Sydney:
this was too good an offer to refuse, so we booked on Virgin
and were off out here: Perth, the most isolated city in the
world. Not only that, but Andrew Heath had organised some
Acrolap barrel-laps for me: they were arriving in Bowen Mountain
about the same time, so we could kill at least two birds with
one stone.
But it was better than that. Andrew knew I had a new lathe,
so out of the blue he says “Stu, would you like to see
how to make piston rings?” Do pigs have bums? Is Britney
an airhead? Would I? Hell yes! So down to his workshop, for
an education in technique you could die for.
But did I need a new ring for my gallant old Enya? Only one
way to find out, I pulled it down and measured the ring gap.
Would you believe .013”? It should have been about .003”.
Could this be where the compression was disappearing? Andrew
showed me an ST60 he had fitted with a new ring. It had compression
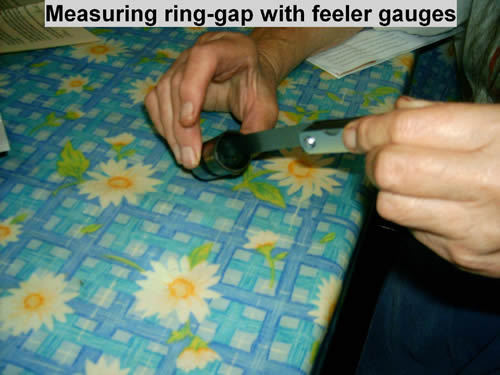
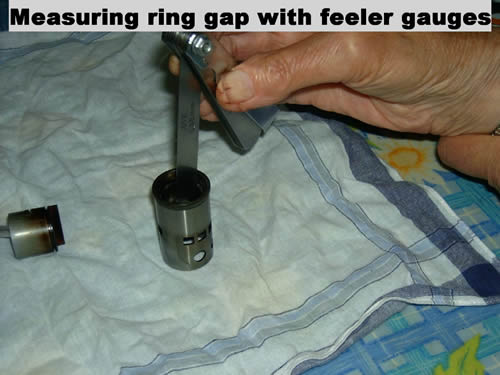
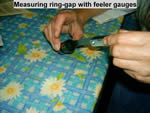
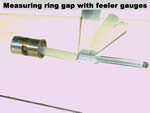
like a Rothwell diesel. I was astonished. By the way, to measure
ring gap, you need to remove the ring from the piston, then
insert the ring into the bore: feeler gauges complete the
method. The ring may be correctly “squared” with
the bore by nudging it into place with the piston skirt.

Closer examination of the Enya ring was interesting. No doubt
about it, this was a well made item. The seat against the
sleeve was excellent. The seat against the piston groove was
bright and shiny, while the pressure side was dark from the
hot gases. Ring tension was good: it was only the ring gap
that let me down, not least because we had re-honed the sleeve,
no doubt increasing the bore by a small amount.
Nevertheless, it was time to make my own ring, matched to
the sleeve in my particular engine. Andrew has agreed to reveal
his secrets, so fasten your seat belts, this is an exciting
ride.
First off, you need some cast iron rod. Blackwoods supply
a grade of Meehanite numbered “4E”. All sorts
of funny metallurgy there: but this grade is the one to use.
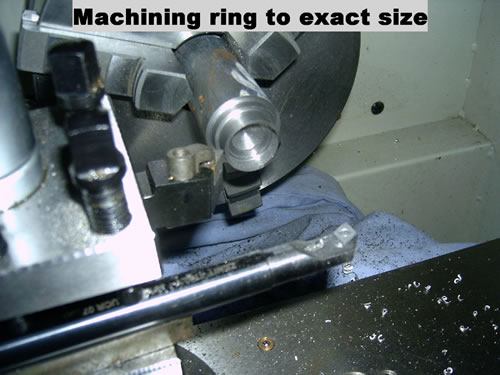
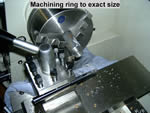
I popped it in the chuck, then machined the inner diameter
to 20mm, the outer diameter to 22.27mm. That outer diameter
was the best I could do to make the sleeve just slide onto
the latent ring. In other words, the ring is machined to exact
size, then parted off to exact depth, in this case 1.00mm.
The ring can now be slid down into the bore: if you have
done it right, this is a very close fit. Of course, you can’t
get it onto the piston yet: the ring has to be “cracked”
and opened out. I’d heard of this “cracking”
process before: guys were wrecking 2 out of every 3 rings
they made, as the cast iron, being brittle, is contrary to
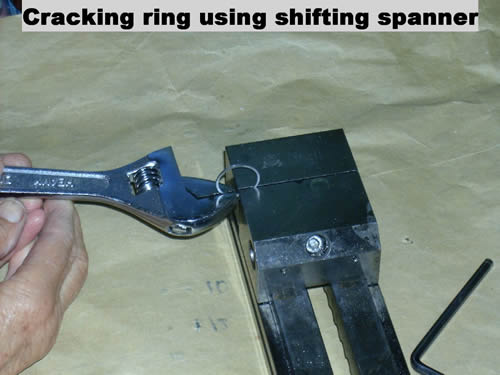
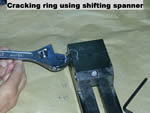
handle. But Andrew had this licked. First you made a slight
nick on the inner side of the ring. The ring was then mounted
in a vice, with the nick hard up against the jaws. I use a
precision vice with smooth jaws, which style jaws avoid marking
the ring. This gave a nice stress concentration, so that with
the overhanging ring held neatly in the jaws of a shifter,
the snap would occur exactly as desired; with a minimal amount
of bending back and forth. In my case, it was once forth and
once back, by the smallest of deflections, lo; there was the
crack. I hardly knew it had happened!
With the crack formed, an attempt was made to again place
the ring in the sleeve. This failed. Evidently, there is distortion
of the metal at the crack, which prevents the ring from closing
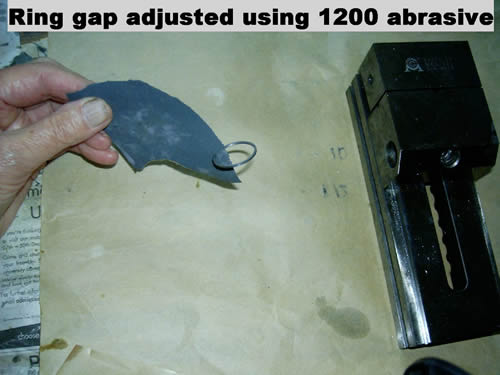
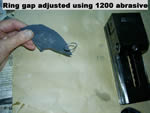
to its original diameter. So the next trick is to clean up
this distortion, then set the ring gap. A piece of carborundum
paper (wet-and-dry) of about 1200 grade (Andrew used 2000
grade, doubled over to dress both sides of the gap at the
same time. This gives a better seal) is inserted into the
gap, then worked back and forth a few times. The ring probably
still won’t go in, so the abrasion is continued by trial
and error until the ring just goes in. At this point, you
need to decide what width the gap should be. A rule of thumb
exists: the gap should be .003” per inch of bore diameter.
I don’t know where this came from, so it’s an
area for experimentation.
I recall an article in FM by Larry Scarinzi, referring to
the ST60 in his “Blue Angel” stunter. Evidently
the weather was hot at the US Nats that year: he thought his
overheating problems were related to ring gap being too close.
Quite possibly, so that is something to watch.
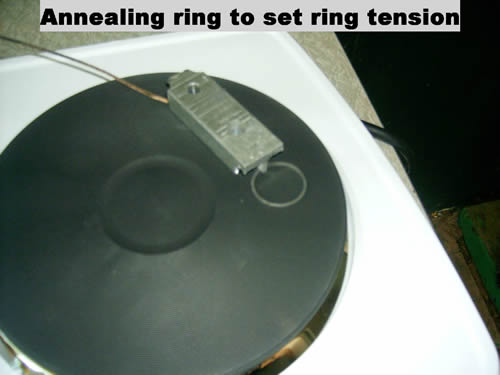
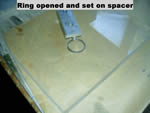
Next step is intended to tension the ring. The idea seems
to be that the ring must mechanically press on the cylinder
walls to provide the seal. This is achieved by inserting a
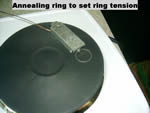
spacer into the ring gap, in order to force it open. By heating
the ring to either red heat or, in my case, 500C, for stress
relief, then the ring takes a permanent set. Andrew has an
electric oven top, on which one of the elements glows red
hot. The ring plus spacer is placed on this element, the element
allowed to heat briefly to red emissivity, then allowed to
cool in air.
Most probably, red heat also causes the cast iron to harden
further. I do not have such an oven, so I bought an electric
hot plate from the Supermarket for $40. The smaller of the
2 elements was 800 watts: regrettably, it would not glow red
hot as I had hoped. Instead it got to only 350C, the maximum
setting on the thermostat. As it happened, this thermostat
could be “adjusted” by simply altering its upper-limit
detent. This got it up to 500C, which was worth a try. The
temperature stress-relief range for cast iron is 450 to 550C,
so this was at least promising.
Andrew sets the gap after heat treating. He uses red heat,
so I guess that is better in case the heat changes the dimensions
of the ring in any way. With the milder 500C treatment, the
gap seemed to be the same after heat treatment. Regrettably,
I forgot to measure the final gap; too late now.
My first attempt using a 2mm spreader, lead to a space of
1.12mm: the ring returned partially to its original shape.
A second attempt with a 3mm spacer gave a space of 2.16mm,
which was taken to be acceptable. The ring did not have the
same “springiness” as the original Enya ring,
but there was no going back now. Only time would tell if the
ring temper was OK for use over time. The clever thing in
all this is that the ring, when compressed to load it into
the cylinder, retains accurately its original circular shape.
This completed the ring, except for some de-burring to remove
rough edges that would catch on the piston during reassembly,
or else score the sleeve. The ring went onto the piston with
no problems, even though I had increased its width from the
original 1.02mm to 1.13mm. Care is needed here to avoid excessive
bending of the ring, thereby introducing a new, unwanted,
permanent set. I do it by inserting one end of the ring gap
into the piston groove, then attempt to use this as a lead
to “winding in” the next piece. Seems to work.
My camera hates doing close-ups; otherwise I would include
a photo.
Well it all went back together, so it was on to the test
bench for 30 minutes bedding in. The ring developed some nice
rub marks during this time. Testing of the hot compression
as soon as the motor stopped suggested that a considerable
improvement had been made with the seal.
In a howling Easterly gale, at about 33C, the “Heart
of Gold” leapt out of the stooge, a bit lean, but otherwise
sweet. Engine had started first flick from a venturi prime,
so I was pretty happy with that. Second flight was a first
flick start, no prime, after sitting in the sun! Well, one
Swallow doth not a summer make, but that looked like a pretty
good result to me.
My thanks to Andrew Heath for sharing his secrets: also for
giving me some Meehanite to make the ring. By the way, if
Bowen Mountain is not paradise, then its only one short hop
away!
|